
Flying with a newborn can feel like a huge challenge for any parent, especially if it’s your baby’s first trip or you’re managing travel after weeks of little sleep. The truth, however, is reassuring: with the right preparation and realistic expectations, newborns are actually some of the easiest travelers. They sleep often, don’t need entertainment, and can remain calm with a little comfort and planning. In 2025, airlines have also improved policies for families, and there is more guidance than ever from health and travel organizations. This complete guide brings together the most up-to-date, real information to give you confidence before boarding. Is It Safe to Fly with a Newborn? For most newborns, flying is considered safe after the first few weeks, but timing depends on your baby’s health. Many airlines allow infants to fly as early as 2 weeks old, but pediatric specialists — including the American Academy of Pediatrics (AAP), commonly suggest waiting until 6–8 weeks, when a newborn’s immune system becomes more developed. You can read more about general newborn health recommendations on the AAP’s website:https://www.aap.org It’s important to talk to your pediatrician before flying, especially if your baby was born prematurely, has respiratory issues, or has not yet completed essential newborn screenings. Once cleared, flying can be perfectly safe, and many babies sleep through most of the trip due to the soothing white noise of the engines. Understanding Airline Rules for Newborn Travel Airlines differ slightly in their rules for infants, but most follow the same basic guidelines. In the United States, children under two may travel as a “lap infant” or in their own paid seat with a car seat approved by the Federal Aviation Administration (FAA). You can review FAA policies on approved child restraint systems here:https://www.faa.gov/travelers/fly_children When preparing for travel in 2025, it’s essential to check your specific airline’s policy on: Major airlines such as Delta, United, and American Airlines publish family travel rules directly on their websites. Checking ahead prevents delays and ensures you get the seating arrangement you want, especially if you’re hoping to use an airplane bassinet, which is typically available only on long-haul flights. Timing Your Flight: The First Step to an Easy Trip Choosing your flight time is one of the most important decisions you’ll make. Newborns tend to follow a sleep-feed-sleep pattern, and aligning your flight with their natural rhythms can make the entire journey more peaceful. Many parents find early-morning flights ideal because airports are calmer, security lines are shorter, and babies are naturally sleepy. Whenever possible, choose a nonstop flight. Layovers add stress, expose your baby to more germs, and increase the likelihood of delays. Nonstop flights help maintain your newborn’s routine and reduce disruptions. If you must take a connecting flight, try to choose longer layovers so you’re not rushing across terminals with a stroller or baby carrier. Choosing the Best Seat on the Plane Seating makes a huge difference in comfort. Parents often prefer seats near the front of the plane, where the engine noise is lower and boarding is easier. Bulkhead rows (rows with a wall in front of them) offer more legroom and are typically where bassinets are installed on international flights. If you purchase a separate seat for your baby, you can bring an FAA-approved car seat on board. The FAA emphasizes that aircraft turbulence can be dangerous for infants, and the safest place for a newborn is in an approved car seat, properly installed. You can review FAA infant safety guidance here:https://www.faa.gov/travelers/fly_children For many families, a lap infant works perfectly fine — but having your baby in a secure seat can offer peace of mind during turbulence. What to Pack: Smart Essentials for a Smooth Flight Packing for a newborn can feel overwhelming, but you truly only need a thoughtfully prepared diaper bag. The key is to be ready for delays, unexpected diaper needs, and feeding. Your diaper bag should include: Feeding supplies depend on whether your baby is formula-fed or breastfed. The Transportation Security Administration (TSA) allows parents to bring breast milk, formula, and baby water in quantities over 3.4 ounces. You can read TSA’s updated 2025 rules for traveling with baby items here:https://www.tsa.gov/travel/special-procedures/traveling-children Many parents also pack a small first-aid kit with saline drops, a nasal aspirator, and pediatrician-approved pain relief. Airplane air is dry, and babies can experience mild congestion during or after the flight. Managing Takeoff and Landing: Protecting Baby’s Ears One of the most common concerns parents have when flying with a newborn is ear discomfort caused by changes in cabin pressure. While pressure issues affect older children more than newborns, sucking can help relieve the sensation. Feeding your baby during takeoff and landing works extremely well. Whether you’re breastfeeding, bottle-feeding, or offering a pacifier, the swallowing motion helps equalize pressure. The Centers for Disease Control and Prevention (CDC) advises ensuring babies stay hydrated during flights, since cabin dryness can increase the need for more frequent feeds. More information is available on CDC travel health advisories:https://wwwnc.cdc.gov/travel Keeping a pacifier or bottle handy before the plane begins moving can save you from a fussy baby mid-air. Keeping Your Newborn Comfortable During the Flight Comfort is the foundation of a good flight experience. Newborns are sensitive to changes in light, temperature, and noise, and creating a cozy environment helps them stay peaceful and sleep for longer periods. Dressing your baby in soft layers allows you to adjust quickly if the cabin becomes warm or cold. Airplanes tend to fluctuate in temperature, and having a blanket helps you maintain your baby’s comfort without overdressing. Using a baby carrier can transform your flight. The gentle motion and closeness often help newborns settle quickly. Many babies sleep through most or all of the flight when securely held against a parent. Just remember that during takeoff and landing, the FAA requires babies in carriers to be removed for safety. Feeding Your Baby on the Plane No matter how you feed your baby, flying adds a few extra steps. If

Newborn Vision: When Do Babies Start Seeing?
When your baby enters the world, one of the first things you wonder is: Can they see me yet? Newborn vision is fascinating, babies are born with blurry eyesight that sharpens dramatically during the first year. Understanding how babies start seeing, how their vision progresses month by month, and how you can help support healthy vision will make those early months more meaningful and reassuring. This friendly, research-based guide includes updated insights and trusted outbound links integrated naturally throughout the article. How Newborn Vision Works Newborns don’t arrive with fully developed eyesight. In fact, pediatric experts at the American Academy of Pediatrics (https://www.healthychildren.org) explain that babies see best from 8 to 12 inches away, perfect for bonding during feedings. The National Eye Institute (https://www.nei.nih.gov) adds that babies’ brains are still learning to interpret visual information, which is why newborn vision is mostly blurry shapes, shadows, and high-contrast patterns. When Do Babies Start Seeing? A Month-by-Month Guide 0–1 Month: Blurry Vision & High Contrast During the first month, babies primarily notice light, shadows, and big shapes. According to Mayo Clinic (https://www.mayoclinic.org), newborns are strongly attracted to high-contrast patterns because their retinas are not fully developed. Your baby can: How you can help:Use simple high-contrast toys and get close during face time. 2 Months: Recognizing Familiar Faces By 2 months, babies start making more eye contact and can recognize the faces of their caregivers. The Centers for Disease Control and Prevention (https://www.cdc.gov) notes that babies begin social smiling at this stage, meaning they can visually connect smiles to people they know. Vision milestones at 2 months: 3–4 Months: Depth Perception Begins One of the biggest visual leaps happens around 3–4 months. The American Optometric Association (https://www.aoa.org) confirms that this is when the two eyes start working together, forming the basis for depth perception. Your baby can now: Tummy time is especially important now. The Mayo Clinic (https://www.mayoclinic.org) recommends daily tummy time to strengthen the muscles that support eye movement. 5–6 Months: Clearer Vision & Fuller Color Range At 6 months, babies can see much more clearly and spot objects across the room. Experts at Johns Hopkins Medicine (https://www.hopkinsmedicine.org) say babies also develop full color vision around this age. Vision milestones at 6 months: Many pediatricians recommend the first eye screening around this age. 7–9 Months: Stronger Distance Vision As babies begin to crawl, their vision improves alongside their movement. Research from the National Institutes of Health (https://www.nih.gov) shows that crawling helps enhance spatial awareness and depth perception. Your baby can: 10–12 Months: Nearly Adult-Level Vision By their first birthday, your child’s vision is sharper, clearer, and much more detailed. According to the Cleveland Clinic (https://my.clevelandclinic.org), babies now see close to adult-level clarity, though visual development continues into early childhood. At this stage, babies can: How to Support Your Baby’s Vision Development 1. Make Eye Contact Often Face-to-face play is one of the strongest ways to support baby vision development, supported by guidance from the American Academy of Pediatrics (https://www.healthychildren.org). 2. Use High-Contrast Books and Toys High-contrast toys stimulate newborn eyesight and help strengthen visual focus. 3. Encourage Daily Tummy Time In line with CDC recommendations (https://www.cdc.gov), tummy time helps develop neck control and visual tracking. 4. Provide Safe Visual Exploration Introduce: 5. Spend Time Outdoors The American Academy of Ophthalmology (https://www.aao.org) highlights that natural outdoor light may help reduce the risk of future nearsightedness. When to Seek Medical Advice Vision problems in babies are rare but important to catch early. Experts at Boston Children’s Hospital (https://www.childrenshospital.org) recommend getting your baby checked if you notice: Trust your instincts, if something feels off, consult your pediatrician. Final Thoughts Watching how babies start seeing is one of the most magical parts of early parenthood. From noticing shadows to recognizing your smile from across the room, your baby’s visual world grows dramatically during the first year. With simple interactions, tummy time, play, and regular check-ups, you support healthy development and enjoy every adorable milestone along the way. Related Reads from Focusonthekids:

When Are You Likely to Be Most Fertile?
If you’ve ever wondered “When am I likely to be most fertile?”, you’re not alone. Whether you’re trying to conceive, practicing natural family planning, or just want to understand your body better, knowing when you’re most fertile can make a big difference. Your fertility window isn’t random it’s a fascinating combination of hormones, timing, and body signals. In this friendly guide, we’ll explore what it means to be most fertile, how to track your fertile days, and how modern research helps women plan with confidence. What Does “Most Fertile” Really Mean? Being “most fertile” means your body is in the part of your menstrual cycle where pregnancy is most likely to occur. This happens when an egg is released (ovulation) and sperm are present to fertilize it. According to Johns Hopkins Medicine, an egg lives for 12 to 24 hours after ovulation, but sperm can survive inside the female reproductive tract for up to five days. This means your fertile window typically lasts six days — the five days before ovulation and the day of ovulation itself. MedlinePlus also notes that conception is most likely if intercourse happens one to two days before ovulation, when cervical mucus helps sperm travel more easily. Understanding the Fertile Window The fertile window is the sweet spot in your cycle when sperm and egg can actually meet. The American College of Obstetricians and Gynecologists (ACOG) states that your best chances of conception are during this six-day window. If you have a regular 28-day cycle, ovulation usually happens around day 14, counting from the first day of your last period. However, every woman’s cycle is unique — stress, sleep, diet, and hormones can all shift that timing. The NHS confirms that some women may ovulate earlier or later than expected, and relying solely on calendar counting can be misleading. A 2024 study published in Human Reproduction found that even women with “regular” cycles can ovulate anywhere between days 10 and 20, meaning your fertile window might move from month to month. How to Tell When You’re Most Fertile Every body gives subtle clues when it’s gearing up for ovulation. Here are the most reliable ways to spot them: 1. Track Your Menstrual Cycle Cycle tracking is the foundation of fertility awareness. Apps like Clue or Flo can help, but even a simple calendar works. As Healthline explains, ovulation generally occurs about 14 days before your next period — not necessarily 14 days after your last one. 2. Observe Cervical Mucus Changes This is one of the most natural and reliable fertility signs.As estrogen rises before ovulation, your cervical mucus becomes clear, stretchy, and slippery — like raw egg whites. According to Mayo Clinic, this mucus helps sperm swim and survive longer. When you notice this texture, you’re likely in your most fertile phase. 3. Monitor Your Basal Body Temperature (BBT) Your basal body temperature — the temperature when you first wake up — rises slightly after ovulation due to progesterone. WebMD notes that charting your BBT over several months can show patterns in your ovulation. The temperature spike means ovulation has already occurred, so you can use this information to better predict your next fertile window. 4. Use Ovulation Predictor Kits (OPKs) OPKs detect the surge in luteinizing hormone (LH) that happens 24–36 hours before ovulation. As Cleveland Clinic explains, getting a positive result means you’re entering your most fertile days. Having sex within 12–24 hours of a positive test gives you the best chance of conception. Common Myths About Fertility There are many misconceptions about fertility windows. Let’s clear up a few: ❌ Myth 1: You can only get pregnant on the day of ovulation Actually, sperm can live inside you for up to five days. That’s why the days before ovulation are also highly fertile (Healthline). ❌ Myth 2: Every woman ovulates on day 14 While day 14 is an average, only about 30% of women actually ovulate that day. Many ovulate earlier or later (NHS). ❌ Myth 3: Fertility apps are always accurate Apps can be helpful, but they’re based on algorithms — not real-time biology. The Guardian recently reported that many fertility apps miscalculate fertile days, especially for irregular cycles. Factors That Can Affect Your Fertility Timing Even if you track perfectly, certain factors can alter when you ovulate: If your periods are irregular or you’ve been trying to conceive for over a year (or 6 months if over 35), the CDC recommends consulting a fertility specialist. How to Maximize Your Chances During the Fertile Window Once you know when you’re most fertile, timing is everything. Here’s what experts recommend: What If You’re Trying to Avoid Pregnancy? If your goal is to avoid pregnancy, knowing when you’re most fertile can still help — but with caution. Natural family planning (NFP) or fertility awareness methods can be effective if used correctly, but according to Planned Parenthood, typical use failure rates can be as high as 23%. For better results, combine tracking methods (like OPKs and mucus observation) and use condoms outside the safe window. Emotional Side of Fertility Understanding your fertile days can bring relief — but also stress if conception doesn’t happen right away. Verywell Health reminds couples that it’s completely normal for conception to take several cycles. Even with perfect timing, healthy couples under 35 have about a 20–25% chance per month of conceiving. If you’ve been trying for a while, don’t lose hope. Emotional well-being, patience, and support from your partner make a real difference. Final Thoughts Knowing when you’re likely to be most fertile is one of the most empowering pieces of information you can have about your body. To summarize: If you’re planning for pregnancy, time intercourse in the 3–5 days before ovulation and on the ovulation day itself. And if things take longer than expected, reach out to a healthcare provider — support and options are available. Understanding your fertility isn’t just about getting pregnant — it’s about feeling connected, confident, and informed about your

12 Essential Tips for a Healthy Pregnancy
Pregnancy is one of life’s most beautiful journeys a mix of excitement, wonder, and maybe a few worries too! Whether it’s your first baby or your fourth, every pregnancy is unique. But one thing never changes: taking care of your health is key to ensuring your baby grows strong and healthy. With medical advancements and better awareness, parents today have more reliable information than ever before. In this post, we’ll explore the most essential tips for a healthy pregnancy in 2025 from nutrition and exercise to mental health, sleep, and prenatal care. So grab a comfy chair (and maybe a snack!), and let’s walk through everything you need to know to make your pregnancy healthier and happier. 1. Start With Early and Consistent Prenatal Care If you’ve just discovered you’re pregnant, congratulations! Your first step should be scheduling an appointment with your healthcare provider. Early prenatal care helps monitor your baby’s development and detect any potential issues early on. Most doctors recommend scheduling your first prenatal visit within 8–10 weeks of pregnancy. From there, regular checkups ensure that you and your baby are on track. According to the American College of Obstetricians and Gynecologists (ACOG, 2025), consistent prenatal care reduces complications like gestational diabetes, preeclampsia, and preterm birth. Many clinics also offer telehealth prenatal appointments, which have become increasingly popular since 2024. 👉 Pro tip: Make a list of questions before every appointment so you don’t forget anything you’re curious or worried about. 2. Eat a Balanced, Nutrient-Rich Diet One of the most important tips for a healthy pregnancy is to eat smart. What you eat fuels both you and your growing baby. A healthy pregnancy diet should include: The CDC recommends taking 400–800 micrograms of folic acid daily, which helps prevent neural tube defects in early pregnancy. Iron and vitamin D are also essential for your baby’s growth and bone development. 👉 Avoid: Raw fish, unpasteurized cheese, deli meats, and high-mercury seafood like swordfish or king mackerel. For extra guidance, you can check the CDC’s healthy pregnancy nutrition page:🔗 CDC – Pregnancy and Nutrition 3. Stay Active – But Do It Safely Exercise and pregnancy go hand in hand! Unless your doctor advises otherwise, staying active helps improve circulation, manage weight, and ease stress. The World Health Organization (WHO) recommends at least 150 minutes of moderate exercise per week for pregnant women. Safe and effective exercises include: Exercise can also help reduce common discomforts like back pain, swelling, and fatigue. 👉 Avoid high-contact sports, hot yoga, heavy weightlifting, or anything with a high risk of falling. If you’re new to exercise, start small try 15 minutes of walking daily and gradually increase. For safe activity guidance, check:🔗 Mayo Clinic – Pregnancy Fitness Tips 4. Get Enough Rest and Manage Stress Sleep can be tricky during pregnancy especially in the later months. But rest is crucial for your health and your baby’s development. Try to get 7–9 hours of quality sleep each night. Sleeping on your left side is ideal because it improves blood flow to your uterus and baby. If stress or anxiety keeps you awake, consider: You can also explore prenatal meditation or apps like Expectful and Calm Mom, which have become trending tools for pregnancy relaxation in 2025. Stress is natural—but too much can affect your blood pressure and overall health. So give yourself permission to slow down and rest. You deserve it! 5. Take Prenatal Vitamins Daily Even the healthiest diet can miss a few nutrients, and that’s where prenatal vitamins come in. According to Harvard Health (2025), the most important nutrients include: Your doctor can help you choose the right prenatal vitamin based on your dietary needs or health conditions. 6. Stay Hydrated Hydration is one of the simplest yet most overlooked tips for a healthy pregnancy. Your body needs extra fluids to support increased blood volume and amniotic fluid levels. Aim for 8–10 glasses of water a day, and more if it’s hot or you’re exercising.You can also include herbal teas (approved by your doctor) or water-rich foods like watermelon, cucumber, and oranges. Avoid sugary drinks and limit caffeine to under 200 mg per day (about one small cup of coffee). 7. Avoid Harmful Substances This one’s non-negotiable: All of these can lead to serious complications like preterm birth, low birth weight, and developmental issues. If you’re struggling to quit, reach out to your doctor. Many hospitals now offer pregnancy-safe cessation programs in 2025 that combine counseling and safe alternatives. For evidence-based guidance:🔗 CDC – Substance Use in Pregnancy 8. Protect Your Mental Health Pregnancy hormones can bring big emotional shifts some days you’re glowing, and others, you’re crying over a diaper commercial (we’ve all been there!). Mood swings are normal, but if you feel persistently sad, anxious, or disconnected, reach out for support. Perinatal depression is common and treatable. Try these mental wellness tips: In 2025, many OB-GYNs now screen for mental health at every trimester, a welcome shift toward holistic care. If you’re struggling, you can find support here:🔗 Postpartum Support International 9. Educate Yourself About Labor and Delivery Knowledge eases fear. Consider taking prenatal or birthing classes many hospitals and online platforms now offer virtual versions. These classes cover: By learning what to expect, you’ll feel more confident and calm when labor begins. A good resource to explore is:🔗 March of Dimes – Labor and Birth 10. Build a Strong Support System Pregnancy is a team effort! Surround yourself with people who uplift you—your partner, friends, family, or a supportive community. You can also find online spaces where parents share real experiences and advice. The “Digital Mom Circles” trend (popular on Instagram and Reddit in 2025) has helped millions of moms-to-be feel connected and supported. Don’t be afraid to ask for help whether it’s meal prep, errands, or just someone to talk to when you’re feeling overwhelmed. 11. Listen to Your Body Every pregnancy is different. Some days you’ll have tons of energy, and other days… not so much. Pay

Positive Parenting Techniques for Modern Families
Parenting in today’s fast-changing world is both rewarding and challenging. Between digital distractions, school pressures, and shifting family dynamics, it can feel like there’s no single “right way” to raise kids. That’s why many families are turning to Positive Parenting Techniques — a modern approach focused on empathy, respect, and healthy communication instead of punishment. In 2025, positive parenting has become one of the most popular and evidence-based parenting movements, backed by psychologists, pediatricians, and educators worldwide. According to UNICEF, this approach helps children feel loved, capable, and understood — essential foundations for long-term emotional health. Let’s explore what positive parenting really means, why it matters more than ever, and how you can apply it in your daily family life. What Is Positive Parenting? Positive parenting encourages parents to guide children with understanding rather than control. Instead of focusing on punishment, it emphasizes connection, communication, and collaboration. Dr. Jane Nelsen, author of Positive Discipline, defines it as “discipline that teaches, not punishes.” Similarly, The American Psychological Association (APA) describes it as a style that fosters emotional growth and responsibility through empathy and consistent boundaries. The core principles include: This approach doesn’t mean letting kids do whatever they want — it means setting firm, loving boundaries and using mistakes as opportunities for growth. Why Positive Parenting Matters in 2025 The digital era has brought new parenting challenges: screen time battles, online safety issues, and increased anxiety among children. A 2024 Pew Research Center study found that 65% of parents believe raising children today is harder than it was 20 years ago due to social media, academic pressures, and less family time. Positive parenting techniques provide emotional grounding amid this chaos. Research from the Harvard Center on the Developing Child shows that emotionally responsive parenting strengthens brain connections linked to empathy, focus, and problem-solving — all crucial skills for modern kids. Core Positive Parenting Techniques Here are the most powerful techniques for building connection and cooperation at home. 1. Practice Active Listening Children need to feel heard. When you truly listen, you validate their emotions and teach them how to communicate respectfully. Instead of: “Stop crying, it’s not a big deal.” Try: “I can see you’re upset your toy broke. That must be frustrating.” This small change helps kids learn that emotions are okay — and manageable. The Child Mind Institute notes that validating emotions builds self-regulation skills and reduces tantrums. Tip: Get down to your child’s level, make eye contact, and repeat what you heard to show understanding. 2. Use Natural Consequences Rather than punishing mistakes, let children experience safe, natural outcomes. If a child forgets their homework, resist the urge to fix it for them. When they face the result at school, they’ll remember next time. This method promotes accountability and critical thinking — skills kids will use throughout life. Positive Discipline experts emphasize that learning from experience is far more powerful than learning from fear. 3. Set Clear, Consistent Boundaries Children thrive when they know what to expect. Setting clear limits helps them feel secure. Explain why rules exist: “We turn off screens an hour before bed because your brain needs rest to grow.” According to the American Academy of Pediatrics (AAP), consistent routines improve behavior, sleep quality, and emotional balance. Pro Tip: Create a family rule chart together to make boundaries a shared agreement instead of a command. 4. Encourage Effort, Not Perfection Praise effort, not just results. This builds a growth mindset, teaching kids that improvement matters more than instant success. Instead of: “You’re so smart!” Try: “You worked really hard on that puzzle — I love your focus!” Research by Stanford University psychologist Dr. Carol Dweck shows that children praised for effort become more resilient and willing to take on challenges. 5. Be a Role Model Kids imitate what they see. Your calmness, kindness, and patience teach more than any lecture. If you make a mistake, admit it. “I lost my temper earlier — I’m sorry. I’ll try to stay calmer next time.” This models accountability and emotional maturity, showing your child it’s okay to be imperfect. 6. Replace Time-Outs with “Time-Ins” Traditional time-outs often isolate children when they most need connection. A “time-in” approach keeps you close while helping them regulate emotions. “Let’s sit together until you feel ready to talk about what happened.” This technique, supported by Aha! Parenting by Dr. Laura Markham, turns misbehavior into a learning moment. 7. Build Emotional Vocabulary Children who can name their feelings are better equipped to manage them. Use emotional word charts or storybooks to teach words like frustrated, worried, and disappointed. You can explore resources from The Gottman Institute to help your child identify and process emotions in healthy ways. 8. Solve Problems Together When conflicts arise, involve your child in finding solutions. “What do you think we can do differently next time?” This approach fosters teamwork and mutual respect. The CDC’s Positive Parenting Tips recommend involving children in decisions to build responsibility and confidence. 9. Balance Screen Time with Real Connection Modern parenting must address digital habits. The AAP recommends: Try creating “no-screen zones” — like during meals or bedtime. Replace scrolling with shared moments like walks, cooking, or reading. 10. Take Care of Yourself Parenting with patience requires energy. Self-care is essential, not selfish. Dr. Laura Markham says: “Your calm presence is your child’s greatest gift.” Get enough sleep, move your body, and connect with supportive friends. When you regulate your emotions, you help your child regulate theirs. For more support, explore Zero to Three — a trusted source for emotional wellness and early parenting tips. Positive Parenting Across Different Ages Every stage of childhood needs a different approach. Toddlers (1–3 years) School-Age Kids (4–10 years) Preteens & Teens (11–18 years) Parenting for Lifelong Health offers free resources to guide parents through every age group. The Science Behind Positive Parenting The brain science behind positive parenting is powerful. A 2024 study by the National Institutes of Health (NIH) found that warm, responsive parenting

How to Talk to Kids About Internet Safety
The internet has become an essential part of childhood — from online learning and video games to chatting with friends and exploring new interests. But while it opens incredible opportunities, it also comes with risks: cyberbullying, online predators, scams, and exposure to inappropriate content. That’s why parents today must know how to talk to kids about internet safety — not once, but as an ongoing conversation. The goal isn’t to scare children but to empower them with knowledge, confidence, and good digital habits. Let’s explore practical, friendly ways to make that conversation meaningful, age-appropriate, and effective — with real insights from experts and 2025 trends. Why Talking About Internet Safety Matters More Than Ever In 2025, kids are spending more time online than ever before. According to Common Sense Media’s 2025 report, children aged 8–12 now spend an average of 5 hours and 35 minutes per day on screens (outside of schoolwork), while teens average nearly 9 hours daily. Meanwhile, Pew Research Center found that: The online world changes rapidly — with AI-generated content, deepfakes, and new apps emerging every month. Children may not always recognize risks or know what to do when something feels wrong. That’s where open, ongoing communication becomes your most powerful tool as a parent. When to Start Talking About Internet Safety You don’t need to wait until your child owns a phone. Experts from Child Mind Institute recommend introducing online safety concepts as early as age 4 or 5, using age-appropriate language. Here’s a quick guide: The key? Keep the conversation open and judgment-free, so kids feel safe coming to you — no matter what happens. Step 1: Create a Safe Space for the Conversation Before diving into online dangers, set a tone of trust and teamwork. Kids need to know you’re not trying to control them — you’re guiding them. Here are a few tips: When kids see that you listen, they’ll be more likely to come to you with problems later. Step 2: Explain What the Internet Really Is Kids often think the internet is “just fun stuff” — games, YouTube, or social media. But they don’t always realize how it works behind the scenes. Use simple analogies to help them understand: “The internet is like a big city. There are good places — parks, schools, shops — and some dark alleys you shouldn’t enter alone.” You can use Google’s Be Internet Awesome to help explain safety in a playful, interactive way. Explain that not everyone online is who they say they are. Just as in real life, strangers online may try to trick or harm people. You can also discuss how data collection works — how apps and websites gather information and why it’s important to protect personal details like real names, addresses, and passwords. Step 3: Teach Core Internet Safety Rules Here are the golden rules every child should know about internet safety. 1. Keep Personal Information Private Tell your child never to share: Explain why — not just “because I said so.” For example: “If you share your school online, someone could find where you are. That’s not safe.” You can show examples from ConnectSafely.org — a great resource for age-appropriate online privacy guides. 2. Think Before You Click or Share Teach them to pause before liking, commenting, or sharing content. Even something harmless could spread rumors or hurt feelings. Show them how screenshots can make “private” posts permanent. Remind them: “Once you post it, you can’t take it back.” 3. Recognize Fake Content and Scams With AI tools creating deepfakes and fake news, kids must learn critical thinking online.Encourage them to ask: Try MediaSmarts — a trusted digital literacy organization with lessons for families. 4. Handle Cyberbullying Confidently Explain what cyberbullying looks like — mean messages, exclusion from groups, fake profiles, or hurtful comments. Tell them: “If someone is mean online, you are never alone. Tell me or a teacher. Don’t delete messages — keep them as evidence.” See StopBullying.gov for guidance on recognizing and reporting cyberbullying. 5. Protect Their Digital Footprint Older kids should understand that colleges and employers often review online behavior.Teach them: “Your posts tell a story about who you are — make sure it’s one you’ll be proud of later.” Step 4: Use Real-Life Scenarios Children learn best through examples. Try these: Use case studies from National Online Safety for realistic examples. Step 5: Set Boundaries Together Instead of strict bans, involve kids in setting limits. The American Academy of Pediatrics recommends: Create: When children help make the rules, they’re more likely to follow them. Step 6: Use Parental Controls Wisely Parental control tools can help — but they should support, not replace, trust. Top tools for 2025 include: Explain that these tools are for protection — not control. Step 7: Talk About Social Media Responsibly If your child uses TikTok, Snapchat, or Instagram, teach them how to stay safe: Refer to Internet Matters for platform-specific safety guides. Encourage your child to follow positive, educational creators instead of toxic trends. Step 8: Encourage Digital Kindness Internet safety isn’t just about avoiding harm — it’s about creating a kind digital world. Teach them to: Explore the #DigCitCommit movement to promote positive online citizenship in your family. Step 9: Keep the Conversation Going Internet safety isn’t one talk — it’s a lifelong conversation.Ask regularly: Stay informed with Cyberbullying Research Center updates and safety articles. Step 10: Be a Role Model Children mirror what they see. Use devices responsibly: You set the tone for your household’s digital behavior. Talk to Kids About Internet Safety in the AI Era Artificial intelligence is shaping children’s online experiences. Explain that not every online “friend” or chatbot is real — some are powered by AI. Teach kids to recognize when a message seems automated or suspicious, and to never share personal information. The FTC offers up-to-date guides on protecting kids’ data and understanding AI-driven apps. Final Thoughts Learning how to talk to kids about internet safety is about more than rules

Social Media Parenting Trend: How Online Is Changing Family Life
In 2025, it’s almost impossible to separate parenting from social media. From baby bump updates and family vlogs to parenting hacks on TikTok, the way parents share, learn, and connect online has completely transformed family life. Welcome to the world of Social Media Parenting — a cultural shift that blends modern technology with one of humanity’s oldest roles: raising children. While this trend brings connection and inspiration, it also raises new challenges about privacy, judgment, and digital wellbeing. Let’s explore how social media parenting became a global movement, what it means for today’s families, and how to navigate it wisely. What Is Social Media Parenting? How parents use social media platforms — like Instagram, TikTok, YouTube, and Facebook — to share their parenting experiences, seek advice, or build communities. It’s more than just posting cute baby pictures. It’s a lifestyle and communication style where: This digital wave is reshaping how parents connect and how children grow up in a world where their lives are often online before they can even walk. How Social Media Changed Parenting Before social media, parenting advice mostly came from family, friends, and books. Now, parents can access global communities 24/7, watch real-life experiences, and get instant reassurance. Here are some major ways social media has changed modern parenting: 1. Access to Instant Support Parents can join online groups for almost anything — from sleep training to postpartum mental health. These communities offer empathy and shared experiences that many parents find comforting. 💬 “I felt alone before joining a Facebook group for new moms. Now I feel like I have friends who actually understand me,” says Julia, a new mother from California. 2. Rise of Parenting Influencers Influencers who share their parenting journeys now shape public opinion. Platforms like Instagram and TikTok have thousands of “momfluencers” and “dadfluencers” who share everything from meal ideas to emotional struggles. These influencers have become the new-age parenting coaches, often driving trends in toys, products, and parenting philosophies. 3. Changing the Definition of Community Social media has redefined the parenting village. Many families now rely on online communities instead of local ones. Whether you’re a single parent in London or a stay-at-home mom in Nairobi, you can connect instantly with others around the globe. Popular Social Media Parenting Trends in 2025 As we move deeper into the digital age, several social media parenting trends dominate online spaces in 2025. 🌿 1. Authentic Parenting Over Perfection Gone are the days of perfectly filtered parenting. Today’s trend is about realness — showing tantrums, messy homes, and emotional honesty. Parents are rejecting the pressure of perfection and embracing vulnerability. Platforms like TikTok are filled with videos titled “The Real Side of Parenting,” where moms and dads share moments of exhaustion or laughter. This shift has created a more relatable and supportive atmosphere online. 📱 2. Digital Parenting Education Short-form content is now the fastest-growing source of parenting education. Experts and pediatricians share bite-sized videos explaining baby sleep cycles, toddler nutrition, and emotional intelligence. Apps like ParentTok and TinySteps (launched in 2025) combine social media with science-backed parenting advice. 🔗 Outlink suggestion: HealthyChildren.org – Digital Parenting Tips 🧠 3. Focus on Mental Health Modern parents are openly discussing postpartum depression, anxiety, and burnout. This openness is one of the most powerful social media parenting trends, helping reduce stigma around mental health. Hashtags like #MomBurnout and #DadAnxiety have millions of views, with users sharing coping strategies and honest reflections. 🍼 4. Minimalist Parenting Minimalist and “slow parenting” lifestyles are trending among millennial and Gen Z parents. These families emphasize quality time, fewer toys, and digital detox days. Instagram pages dedicated to minimalist nurseries, sustainable toys, and gentle discipline attract huge audiences. The message is clear: less stuff, more connection. 🤳 5. Monetizing Parenthood Parenting has become a digital career path for some families. Many parents earn income by reviewing baby gear, creating family content, or sharing educational videos. However, this also sparks debate about children’s digital privacy — should kids grow up with millions of followers before they can consent? Countries like France and Canada have begun introducing child influencer protection laws in 2025, ensuring earnings are held in trust and limiting exploitative exposure. 🔗 Outlink suggestion: UNICEF – Digital Rights for Children The Pros of Social Media Parenting Like any tool, social media can be positive when used mindfully. Here are the key benefits: 1. Community and Support Social media helps parents feel less isolated, especially new moms and dads. They can instantly connect with others who understand their struggles. 2. Education and Resources Parents have access to professional advice, courses, and expert-led pages for free or low cost. 3. Creative Expression Parents use digital platforms to document milestones, share art, or start passion projects around family life. 4. Advocacy and Awareness Social media gives parents a voice to raise awareness about issues like postpartum care, autism inclusion, and maternity rights. The Cons of Social Media Parenting Despite the positives, there are also real challenges that come with the social media parenting lifestyle. 1. Comparison and Pressure Seeing “perfect” families online can make parents feel inadequate. Constant comparison leads to guilt and self-doubt. 2. Privacy Concerns Posting children’s photos can expose them to digital risks. Many experts recommend limiting what is shared publicly. 3. Monetization and Boundaries The rise of “family influencers” blurs the line between genuine content and commercial promotion. It’s important for parents to protect their child’s right to privacy and safety. 4. Information Overload Not all parenting advice online is accurate. Misinformation about sleep training, vaccinations, or diets can spread quickly. ✅ Always verify advice with qualified professionals before applying it. How to Use Social Media Mindfully as a Parent Here are some practical ways to balance connection with caution: 💡 Tip: Create “offline days” for your family to focus on real-world bonding. Expert Opinions on Social Media Parenting Psychologists and digital wellbeing experts are increasingly studying the effects of social media parenting on families. The Future of Social Media
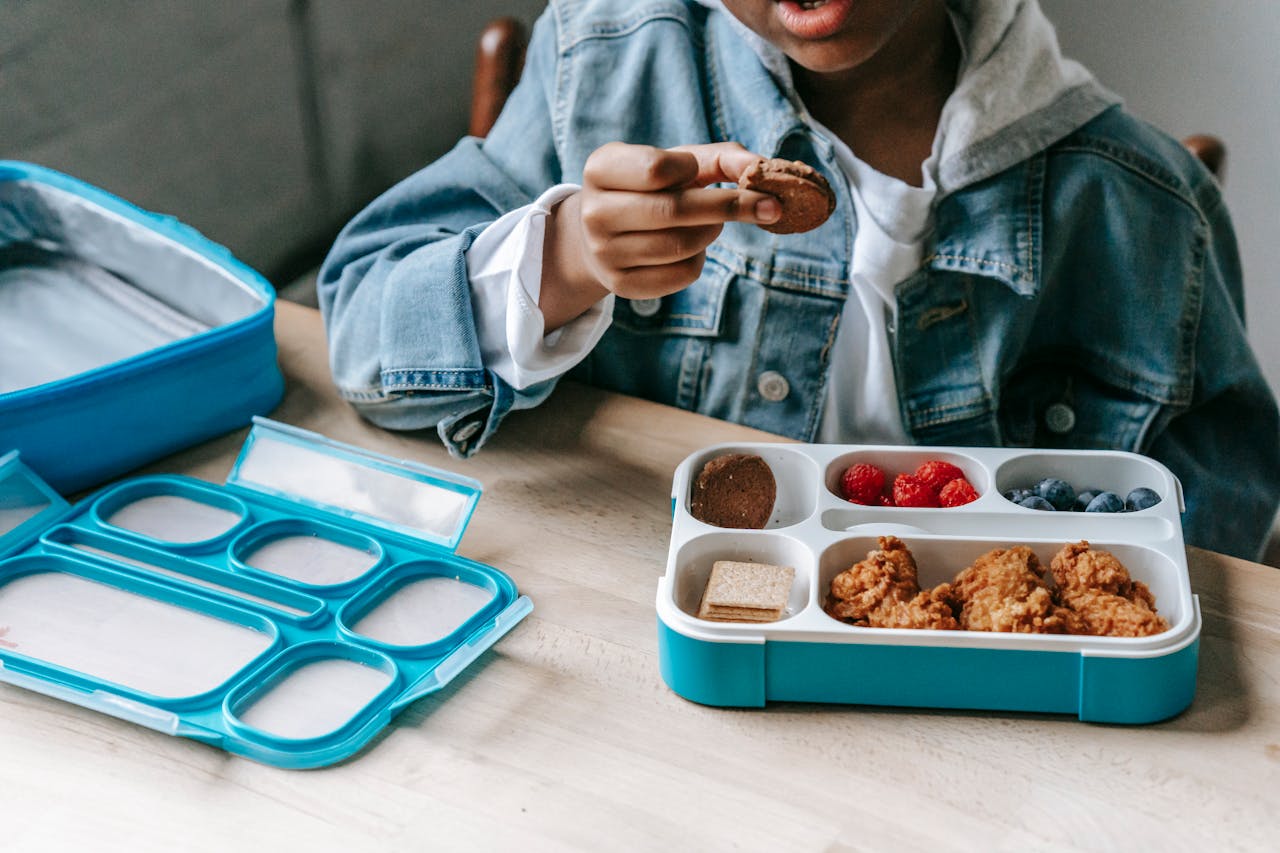
Toddler Lunch Ideas: Nutritious and Easy Meals for Little Ones
Lunchtime with a toddler can feel like an Olympic sport. One day, they devour everything on their plate; the next day, they’ll only accept crackers and cheese. If you’re searching for fresh, healthy, and creative toddler lunch ideas, you’re not alone. In 2025, parents are looking for meals that are not only balanced and kid-approved but also easy to prepare for busy schedules. This article brings you trending lunch ideas, nutrition guidelines from experts, and practical tips to keep even the pickiest toddler happy at mealtime. Why Toddler Lunch Matters Lunch is more than just a midday refuel—it’s critical for growth, learning, and energy. According to the American Academy of Pediatrics, toddlers need a balanced mix of carbohydrates, protein, fats, vitamins, and minerals for healthy development. A well-rounded lunch can: Nutritional Needs of Toddlers Before diving into recipes, let’s cover the basics of what should be on a toddler’s plate: 💡 Tip: Keep portions small—toddlers have little tummies, and too much food can overwhelm them. Challenges Parents Face at Lunchtime The good news? With smart planning and variety, lunchtime can be easier (and even fun!). Top Toddler Lunch Ideas for 2025 Here’s a roundup of trending, balanced, and toddler-approved lunch ideas: 1. Mini Bento Boxes Bento-style lunches are a hit in 2025. They allow variety and portion control while making food visually appealing. Example Box: 2. DIY Mini Pizzas Use whole-wheat pita or English muffins as a base. Let toddlers “decorate” their pizza with tomato sauce, shredded cheese, and veggie toppings like bell peppers or spinach. 3. Veggie Nuggets Homemade veggie nuggets (made with sweet potato, carrots, and peas) are healthier than store-bought and can be baked ahead for quick reheats. 4. Wrap Pinwheels Spread hummus or cream cheese on a tortilla, add thinly sliced turkey or veggies, roll, and cut into toddler-sized pinwheels. 5. Pasta Salad Cups Cold pasta salad with peas, shredded chicken, and olive oil dressing is refreshing and filling. 6. Egg Muffins Whisk eggs with chopped veggies and cheese, bake in muffin tins, and freeze extras for busy days. 7. Snack-Style Lunches Some toddlers prefer variety over one big dish. Create a mix-and-match plate with: 8. Toddler-Friendly Sushi Rolls Not raw fish—just fun wraps! Use seaweed or tortillas with rice, avocado, cucumber, and cooked salmon or egg strips. 9. Soup & Sandwich Combo Tomato soup with grilled cheese fingers or chicken noodle soup with buttered toast strips works beautifully for toddlers. 10. Leftover Remix Don’t underestimate last night’s dinner. Turn roasted chicken into mini quesadillas or extra veggies into a stir-fry rice bowl. Trending Toddler Lunchbox Ideas With many toddlers attending daycare or preschool, lunchboxes are just as important as meals. In 2025, parents are loving: Check out Parents.com for reviews of the best toddler lunchboxes. Allergy-Friendly Toddler Lunch Ideas With food allergies on the rise, parents need safe alternatives. The Food Allergy Research & Education (FARE) site provides excellent resources for safe swaps. How to Make Lunch Fun for Toddlers Meal Prep Tips for Busy Parents For practical prep hacks, visit EatingWell. What Experts Say About Toddler Lunches Common Mistakes to Avoid Real Parent Tips from 2025 Sample Weekly Toddler Lunch Plan Here’s a realistic plan with variety: Monday: Mini pita pizzas, cucumber slices, apple wedgesTuesday: Egg muffins, steamed carrots, whole-grain crackersWednesday: Pasta salad cups, grapes, yogurtThursday: Wrap pinwheels, baby tomatoes, cheese cubesFriday: Veggie nuggets, sweet potato fries, banana slices FAQs About Toddler Lunch Ideas 1. How much should a toddler eat at lunch? A few tablespoons of each food group—toddlers eat smaller amounts than adults. 2. Can toddlers eat leftovers? Yes, as long as they are reheated and stored safely. 3. How do I get my picky eater to try new foods? Offer new items alongside familiar favorites without pressure. 4. Should I pack dessert for lunchboxes? Yes, but keep it healthy—like fruit or yogurt parfaits. 5. Can I meal-prep toddler lunches in advance? Absolutely. Many meals freeze well and can be reheated quickly. Conclusion Coming up with toddler lunch ideas doesn’t have to be stressful. By mixing nutritious ingredients, fun presentations, and a little creativity, you can make lunchtime something your toddler looks forward to. Whether it’s colorful bento boxes, allergy-friendly swaps, or leftovers turned into something new, the key is balance and variety. Remember—toddlers thrive on routine, but they also love surprises on their plate. So, the next time your toddler demands “something different,” you’ll have a full toolkit of ideas ready to go. Related Reads from Focusonthekids:

Toddler Bed: A Complete Guide for Parents in 2025
Transitioning from a crib to a toddler bed is one of the biggest milestones in your child’s early years. It’s exciting, a little nerve-wracking, and often filled with questions. When is the right time? What type of toddler bed is best? How do you make the transition smooth and safe? This guide will walk you through everything you need to know about toddler beds in 2025, blending real insights from experts, trending designs, and practical tips from parents who’ve been through it. What Is a Toddler Bed? A toddler bed is a small-sized bed designed for children who’ve outgrown their crib but aren’t quite ready for a full-size twin bed. Typically designed for ages 18 months to around 5 years, toddler beds: Think of it as the stepping stone between the security of a crib and the independence of a “big kid” bed. When Should You Move to a Toddler Bed? There isn’t a strict age, but most children transition between 18 months and 3 years. Some signs your child may be ready: 💡 Tip: Don’t rush. If your toddler isn’t climbing out yet and seems comfortable, it’s okay to wait. Benefits of a Toddler Bed Challenges of Moving to a Toddler Bed While exciting, the move comes with hurdles: Types of Toddler Beds In 2025, the market is full of innovative designs to fit every budget and style. 1. Classic Toddler Bed Simple, affordable, and functional. Usually wood or metal frames with side rails. 2. Convertible Toddler Bed Starts as a crib, then converts into a toddler bed. Great investment for long-term use. 3. Theme Toddler Bed Cars, princesses, animals, superheroes—you name it. These beds make bedtime fun. 4. Montessori Floor Bed A mattress on a low frame or directly on the floor. Encourages independence and is trending among minimalist parents. 5. Smart Toddler Beds Yes, smart beds exist in 2025! Some include built-in night lights, white-noise machines, or app-controlled features for parents. Safety Tips for Toddler Beds The American Academy of Pediatrics (AAP) emphasizes safety during the transition: For more safety tips, visit HealthyChildren.org (AAP). Preparing Your Toddler for the Transition Here are strategies to make the shift smoother: Common Mistakes to Avoid Trending Toddler Bed Designs in 2025 Parents today are choosing designs that combine fun, function, and sustainability. Some trends include: How Much Does a Toddler Bed Cost? Prices vary widely: 💡 Tip: You don’t need to overspend. A safe, sturdy, basic toddler bed works just as well as a themed one. Toddler Bed vs. Twin Bed Some parents wonder if skipping the toddler bed is better. Here’s a quick comparison: Feature Toddler Bed Twin Bed Size Uses crib mattress Larger mattress Height Low to ground Higher off ground Safety Built-in guardrails Guardrails must be added Cost Affordable More expensive Longevity 2–3 years 8+ years 👉 If budget and space allow, some parents go straight to a twin with rails. But if safety and familiarity are priorities, a toddler bed is the better choice. FAQs About Toddler Beds 1. What age should a child move to a toddler bed? Most move between 18 months and 3 years, but it depends on readiness. 2. How do I keep my toddler from getting out of bed? Keep routines consistent, use a reward chart, and gently return them to bed when they wander. 3. Are toddler beds worth it? Yes, for families who value safety, independence, and affordability. 4. Can I reuse the crib mattress? Yes, most toddler beds are designed to fit a standard crib mattress. 5. How long will my child use a toddler bed? Usually 2–3 years, until they’re ready for a twin bed. Conclusion A toddler bed isn’t just furniture—it’s a symbol of your child growing up, gaining independence, and taking their first steps toward “big kid” life. While the transition can bring challenges, with the right timing, preparation, and safety precautions, it can be a smooth and positive experience. Whether you go for a classic frame, a fun-themed design, or even a Montessori-style floor bed, the goal is the same: to give your toddler a safe, cozy place to dream big. So, when your little one starts climbing out of their crib or begging for a “big kid” bed, you’ll know exactly what to do. Related Reads from Focusonthekids:

Signs Your Baby Needs a Break : Understanding your baby
Parenting is a beautiful yet demanding journey. Babies are tiny bundles of joy, but they are also little humans who experience stress, fatigue, and overstimulation. Just like adults, sometimes a baby needs a break. Learning to recognize the subtle (and not-so-subtle) signs your baby gives when they need downtime is key to keeping them happy, healthy, and well-adjusted. In this article, we’ll explore the signals, what they mean, why they happen, and how you can respond to your baby’s needs in 2025, with real insights and research-based advice. Why Babies Need Break Babies are constantly learning—about their environment, their bodies, and the people around them. This rapid growth and discovery can overwhelm their developing brains and nervous systems. Just like you might feel frazzled after a long workday, babies can also reach a point where everything feels “too much.” Breaks are critical for: Recognizing these signals helps you: Common Signs Your Baby Needs a Break 1. Turning Away From Stimuli When your baby suddenly looks away from toys, people, or lights, it’s often a clear sign they’ve had enough stimulation. They may bury their face into your chest or twist their head away. 2. Crying That Escalates While crying is normal, escalating cries that don’t improve with feeding, changing, or cuddling often mean your baby needs quiet time. Think of it as their way of saying, “I need space.” 3. Clenched Fists or Stiff Body Physical tension, like clenched fists, arching the back, or stiff arms and legs, can signal sensory overload. This may happen after loud noises, bright lights, or crowded settings. 4. Yawning, Rubbing Eyes, or Pulling Ears These are classic tired cues. Sometimes parents mistake these for boredom, but they’re strong signals that your baby needs rest or downtime. 5. Sudden Fussiness After Play If your baby goes from giggling to crying after a short play session, it could be overstimulation. Play is wonderful but even enjoyable activities can overwhelm babies. 6. Difficulty Feeding Overwhelmed babies might refuse to feed, pull away from the breast or bottle, or struggle to latch. It’s not always about hunger—it may be about needing calm. 7. Hiccups or Sneezing Believe it or not, repeated hiccups or sneezing in infants can sometimes be subtle indicators of stress or fatigue, especially when paired with other cues. 8. Zoning Out or Glazed Look A baby who suddenly seems to “tune out” or stare blankly might be self-regulating by taking a mental break. This doesn’t mean something is wrong—it’s their protective response. Why Overstimulation Happens In today’s world, babies are surrounded by sensory input—bright lights, noisy toys, TV screens, and busy schedules. Add to that the developmental leaps happening in their brains, and it’s no surprise a baby needs a break to process everything. Research from the American Academy of Pediatrics highlights that overstimulation is one of the most common causes of fussiness in infants. Unlike adults, babies lack coping strategies, so they rely on parents to notice and respond. How to Respond When Your Baby Needs a Break 1. Create a Calm Environment Dim the lights, turn off background noise, and provide soothing touch. A quiet space helps your baby reset. 2. Offer Skin-to-Skin Contact This is especially helpful for newborns. It regulates their heartbeat, breathing, and stress levels. 3. Swaddle or Use a Sleep Sack For younger babies, swaddling provides a secure, womb-like feeling. For older infants, a sleep sack is a safer option. 4. Provide Gentle Rhythmic Movements Rocking, gentle bouncing, or a walk in the stroller can soothe a baby’s overstimulated nervous system. 5. Respect Nap Times Skipping naps can worsen overstimulation. Stick to a routine whenever possible to give your baby predictable downtime. 6. Limit Visitors and Outings Too many new faces and places in one day can overwhelm your baby. Try shorter, calmer visits instead. 7. Offer a Comfort Object Some babies self-soothe with a soft blanket or pacifier. These can help signal it’s time to wind down. Preventing Overstimulation Being proactive is just as important as responding. Here’s how to reduce the chances your baby needs a break: Long-Term Benefits of Responding to Break Cues When to Be Concerned Occasional overstimulation is normal. But if your baby seems constantly irritable, unresponsive, or struggles with feeding and sleep despite calm routines, consult your pediatrician. Persistent signs may indicate reflux, sensory processing differences, or other health issues. Resources like HealthyChildren.org can provide additional guidance. Practical Tips for Parents in 2025 Real Parent Stories Conclusion Babies don’t come with instruction manuals, but they do communicate—just in nonverbal ways. Understanding when your baby needs a break helps you create a calm, supportive environment that nurtures growth and bonding. By spotting the signs early and responding with patience, you’ll not only reduce meltdowns but also build trust and security with your little one. Remember: sometimes the best gift you can give your baby is simply the gift of quiet and rest. FAQs 1. Can a newborn really be overstimulated? Yes. Even young babies can become overwhelmed by noise, light, and activity. 2. How long should breaks last for babies? It depends on the baby. Some only need a few minutes of quiet; others may need a full nap. 3. Are signs of overstimulation the same as colic? Not always. Colic is persistent, inconsolable crying, while overstimulation often eases with calming strategies. 4. Should I avoid social outings with my baby? No. Just plan breaks during outings, and be mindful of how long your baby can handle new environments. 5. When should I see a doctor about fussiness? If fussiness is constant and not relieved by soothing, or if your baby struggles with feeding or growth, consult your pediatrician. Related Reads from Focusonthekids: